Thinking about tackling your roof installation yourself?
Installing roof shingles might seem straightforward—until you’re 20 feet in the air with a nail gun, wondering if you’re doing it right. One misplaced nail, one missed step in the underlayment, and you’re looking at leaks, blown-off shingles, or worse.
Here’s the truth: roof shingle installation is a skilled trade for a reason. It requires precise technique, specialized knowledge, and experience that most DIYers simply don’t have. Even professional roofers spend years perfecting their craft.
That said, understanding how the process works helps you make smart decisions about your roof. Whether you’re evaluating quotes from contractors or considering a DIY approach for a small shed, this guide breaks down exactly what’s involved in proper shingle installation.
We’ve been installing roofs across Long Island for 35 years. We know what works, what doesn’t, and what Long Island’s harsh weather demands from your roofing system. Let’s walk through the complete process—and help you decide if this is truly a DIY project or one best left to the pros.
What You Need to Know Before Installing Roof Shingles
Before you climb onto your roof, understand what you’re getting into.
Roof work ranks among the most dangerous home improvement projects. According to OSHA, falls from roofs account for one-third of construction-related fatalities. That’s not meant to scare you—it’s meant to make you think twice about safety.
Beyond the danger, there’s complexity. Improper installation voids manufacturer warranties, creates leak points, and can cost thousands more in repairs down the road. Quality roofing shingles deserve professional installation to protect your investment.
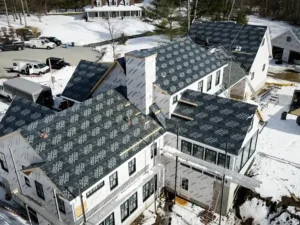
Long Island’s weather adds another layer of challenge. Nor’easters, heavy snow loads, salt air, and summer heat cycles put extreme stress on roofing systems. The installation techniques that work in Arizona won’t necessarily work here.
Should You DIY or Hire a Professional?
Let’s be honest about when DIY makes sense.
Small, low-slope structures like sheds or garage roofs? Manageable for an experienced DIYer with proper safety equipment and patience.
Your main house? That’s different. Multi-story homes, steep pitches, complex valleys, and extensive square footage make this a job for certified professionals.
Consider the hidden costs of DIY. You’ll need to rent equipment, buy or borrow specialized tools, source materials, arrange disposal, and invest serious time. Factor in the risk of mistakes that require professional fixes, and the “savings” often disappear.
We’ve seen countless DIY jobs that needed complete tear-offs because critical steps were missed. Ice and water barriers installed incorrectly. Flashing that wasn’t sealed properly. Shingles that blew off after the first windstorm because nailing patterns were wrong.
If your home is your biggest investment, why risk it?
Essential Tools and Materials for Shingle Installation
Professional shingle installation requires the right equipment.
Safety Equipment (Non-Negotiable)
- Fall protection harness and rope anchored to a secure point. Your life literally depends on this.
- Slip-resistant work boots with good ankle support. Roofs are more slippery than you think, especially with morning dew or dust.
- Hard hat to protect against falling debris. Safety glasses for eye protection from flying nail fragments.
- Heavy-duty work gloves for hand protection and better grip.
Installation Tools
- Pneumatic roofing nailer (also called a nail gun) speeds up the process dramatically. Hand-nailing an entire roof is backbreaking work.
- Roofing hammer or hatchet if you’re going the manual route. Look for models with a built-in shingle gauge and hatchet blade.
- Chalk line for marking straight guidelines. Absolutely critical for keeping courses aligned.
- Utility knife with replaceable blades for cutting shingles. You’ll go through several blades on a typical roof.
- Measuring tape, carpenter’s pencil, and straightedge for layout work.
- Roofing shovel or tear-off fork for removing old shingles. Makes the demo process much faster.
- Extension ladder rated for your weight plus materials. It needs to extend at least three feet above the roofline.
Materials You’ll Need
- Asphalt shingles in your chosen style. CertainTeed shingles offer excellent quality and industry-leading warranties.
- Roof deck underlayment (felt or synthetic). This water barrier sits between your deck and shingles.
- Ice and water shield for valleys, eaves, and other vulnerable areas. Essential for Long Island winters.
- Drip edge flashing (metal) for eaves and rakes. Protects your fascia and directs water properly.
- Starter strip shingles or cut-down standard shingles for the first course.
- Ridge cap shingles for finishing the peak. Don’t skimp here—standard shingles don’t work as ridge caps.
- Roofing nails (typically 1¼-inch galvanized). Buy more than you think you need.
- Roofing cement for sealing flashing and penetrations.
- Step flashing for chimneys and vertical walls. Valley flashing for where roof planes meet.
Step 1: Prepare Your Roof Surface
Proper preparation makes or breaks your installation.
Start by clearing the work area below. Move patio furniture, cars, grills, and anything else that could be damaged by falling debris. Put tarps down to catch nails and shingle pieces—your lawn and landscaping will thank you.
Remove all old shingles down to the bare roof deck. Use a roofing shovel to pry them up, working from the ridge down to the eaves. This is brutal physical labor in Long Island’s summer heat.
Pull out every single nail. Protruding nails will tear holes in your new shingles. Use a hammer to pound down stubborn ones or a pry bar to extract them completely.
Inspect your roof deck carefully. Look for soft spots, water damage, rot, or any sagging areas. Replace damaged plywood or OSB sheathing before going any further.
Check that all decking is securely fastened to the rafters. Add screws if you find any loose sections. Your new shingles need a solid, flat surface.
Sweep the entire deck clean. Remove all debris, old nails, and dirt. A clean surface ensures proper adhesion of your underlayment.
Now’s the time to address any structural issues. If you spot problems with rafters, trusses, or serious water damage, stop. These require professional assessment before you continue.
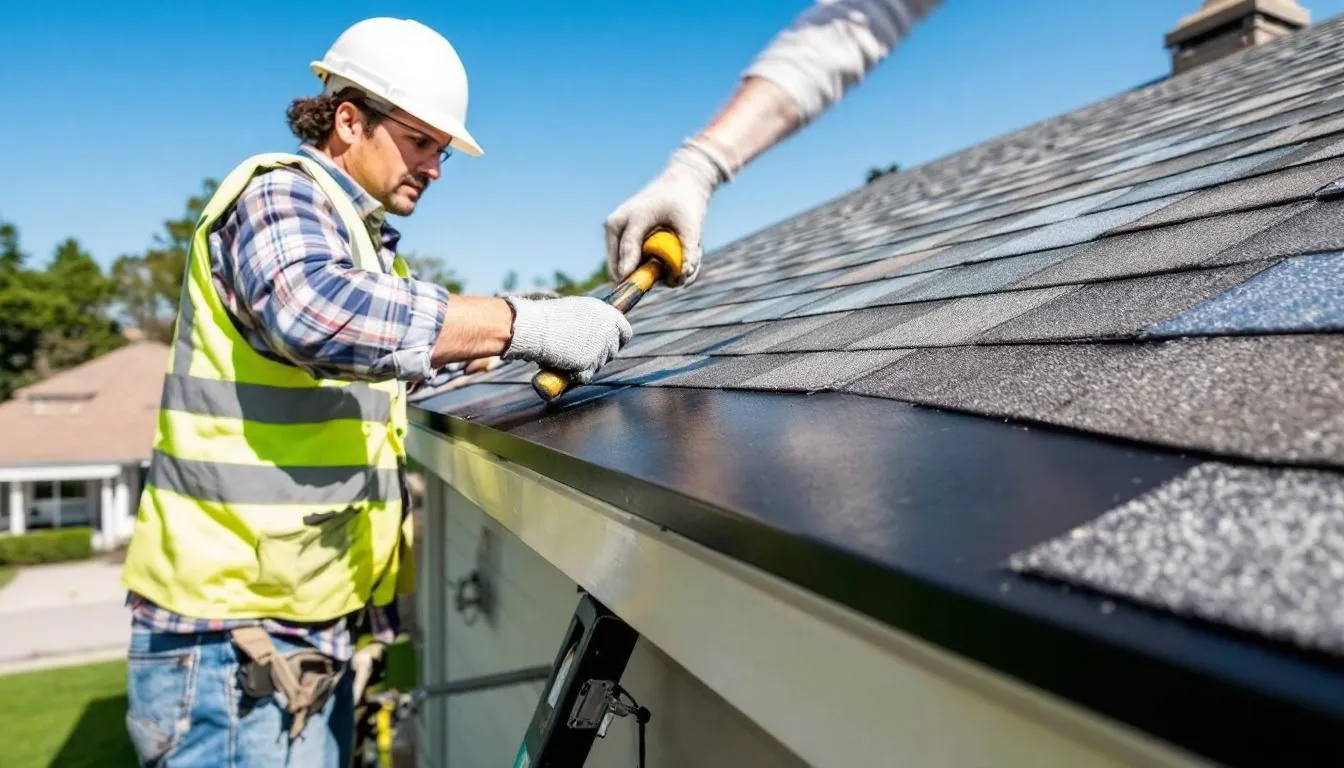
Step 2: Install Drip Edge at the Eaves
Drip edge seems like a small detail, but it’s critical.
This metal flashing runs along your eaves (the bottom edge) and rakes (the angled sides). It serves two purposes: directing water away from your fascia and into gutters, and creating a clean, finished edge.
- Start at one corner of your eaves. Line up the drip edge so it’s flush with the roof edge. Mark both ends with a pencil.
- Snap a chalk line between your marks for a straight reference line.
- Pull the drip edge down about half an inch from that chalk line. This creates the proper overhang.
- Nail it in place using 1¼-inch galvanized roofing nails spaced every 12 inches. Don’t overdrive the nails—flush is perfect.
- Overlap sections by about two inches where pieces meet. This prevents gaps where water could sneak through.
Here’s where installation order matters: At the eaves (bottom), drip edge goes on first, before underlayment. At the rakes (sides), it goes on after underlayment. This layering ensures water flows properly.
Step 3: Apply Ice and Water Barrier
Long Island winters demand serious ice dam protection.
Ice and water shield is a self-adhering membrane that seals against water infiltration. It’s especially critical for our climate where ice dams can force water back under shingles.

Start at the eaves. Roll out the ice and water barrier across the bottom of your roof, extending from the eave up at least 24 inches past the interior wall line. Local building codes may require more—check before you start.
Peel back the protective film as you go. Press the membrane firmly onto the deck, working out any bubbles or wrinkles. Use a J-roller if you have one for better adhesion.
Overlap the next course by at least four inches. The top course always overlaps the bottom one—remember, water flows downward.
Apply ice and water shield in all valleys where two roof planes meet. These are prime leak locations. Extend it at least 12 inches on both sides of the valley centerline.
Also protect areas around chimneys, skylights, dormers, and vent pipes. Any roof penetration needs this extra protection.
Work carefully—this stuff is sticky and difficult to reposition once it’s down. But don’t rush. Proper installation here prevents 90% of future leak problems.
Step 4: Install Roofing Underlayment
Underlayment creates your roof’s secondary weather barrier.
You have two main options: traditional felt (asphalt-saturated) or modern synthetic underlayment. Synthetic costs more but installs easier, lasts longer, and handles foot traffic better during installation.
Start at the bottom eave, right on top of your ice and water shield. Roll out the underlayment horizontally across the roof.
Overlap the ice and water barrier by at least four inches at the eaves. In valleys, overlap the valley membrane by at least six inches.
Secure it with cap nails or staples per manufacturer specifications. Typical spacing is every 12 inches along edges and 24 inches in the field.
Each successive row overlaps the one below it. Standard overlap is 2-4 inches on low-slope roofs, but check your local code. Steeper pitches may require different overlap amounts.
Keep the underlayment tight, straight, and smooth. Wrinkles and bubbles create weak points and look terrible when you’re done.
If you need two pieces to complete a course, overlap the vertical seams by at least six inches. Seal these joints with roofing cement for extra protection.
Step 5: Install Drip Edge at the Rakes
Remember how we skipped the rake drip edge earlier?
Now it goes on—over the underlayment this time. This installation order (under at eaves, over at rakes) is crucial for proper water management.
Measure and cut your rake drip edge pieces to length. Work up from the eave toward the ridge on each gabled end.
Nail through the underlayment into the roof deck every 12 inches. Make sure edges overlap by two inches at joints.
Step 6: Calculate and Mark Your Shingle Layout
Professional-looking results require precise layout.
Most architectural shingles have a 5 to 5⅝-inch exposure—meaning that’s how much of each shingle shows after the one above it overlaps.
Measure up from the eave edge and mark at 12 inches. This accounts for your starter course plus the first full shingle course.
From there, mark every 5 or 5⅝ inches (depending on your shingle specs) all the way up to the ridge. These marks show where each course sits.
Snap horizontal chalk lines at each mark. These lines keep your courses straight and your exposure consistent. Don’t skip this step—crooked courses look terrible and perform poorly.
Also snap vertical chalk lines every few feet to guide your stagger pattern. Most shingles need tabs offset by 6 inches from row to row, but check your manufacturer’s instructions.
Step 7: Install Starter Shingles
The starter course is your foundation—literally.
You have two options: buy pre-made starter strips or cut standard shingles. Pre-made starters save time and ensure proper adhesive placement. They’re worth the extra cost.
If you’re cutting your own, flip a standard three-tab shingle upside down and cut off the tabs. This leaves you with the top portion that has the adhesive strip.
Place your first starter shingle at the bottom corner, overhanging the drip edge by about ¼ to ½ inch. This overhang is critical—it directs water into the gutter instead of behind the fascia.
Nail it in place using four nails per shingle. Place nails 3-4 inches up from the bottom edge and about 1 inch from each end. The next full shingle course will cover these nails.
Continue across the entire eave with starter shingles, butting them tightly together. No gaps.
Run starter shingles up the rakes too if your manufacturer recommends it. Some do, some don’t—check the installation instructions.
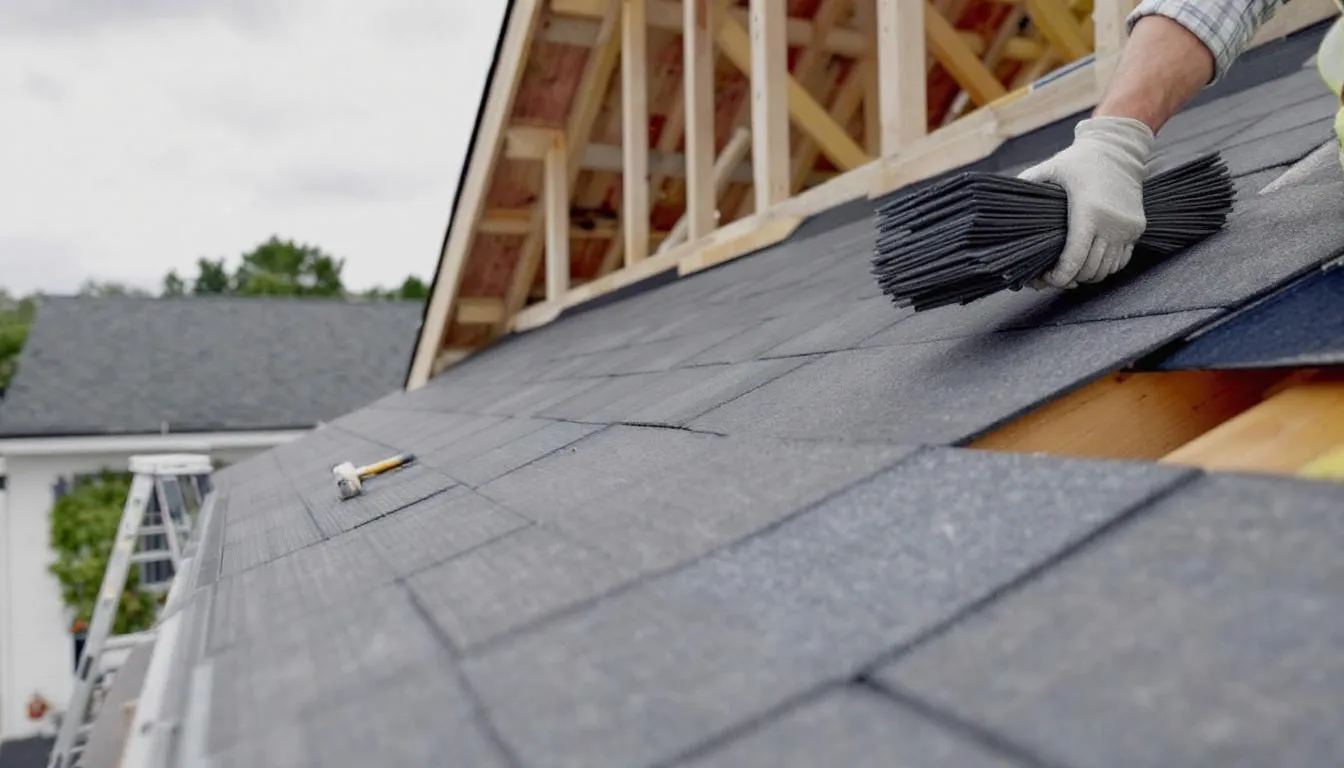
Step 8: Install Your First Course of Field Shingles
Now comes the main event.
Place your first full shingle at the bottom left corner (or right if you’re left-handed—work in the direction that feels natural). Align it perfectly with your chalk lines and the starter course below.
Drive four nails per shingle for standard installations. High-wind areas (like much of coastal Long Island) require six nails.
Nail placement matters enormously. For most three-tab shingles, place nails about 1 inch from each end and 1 inch above the cutouts. For architectural shingles, follow the nail line marked by the manufacturer.
Drive nails straight in, not at an angle. Set them flush—not too deep (which punctures the shingle), and not too shallow (which creates a bump).
Each nail should penetrate through the shingle you’re installing AND the top portion of the shingle below it. This “double coverage” is what keeps your roof tight.
Continue across the entire first course, butting each shingle firmly against the next. No gaps between shingles.
Step 9: Create Your Stagger Pattern
Proper stagger prevents water infiltration and improves wind resistance.
For the second course, cut 6 inches off the first shingle before installing it. This offsets the seams from the first row.
Install this shortened shingle, lining its bottom edge with the top of the cutouts in the first course below. Nail it securely.
Continue across with full shingles for the rest of the second course.
For the third course, cut 12 inches off the first shingle. Fourth course uses a full shingle. Fifth course cuts 6 inches off again.
This creates a diagonal stagger pattern that prevents seam alignment. Aligned seams create leak paths—staggered seams don’t.
Follow this pattern (6″, 12″, full, repeat) all the way to the ridge. Stay consistent.
Some architectural shingles use different offset patterns—4 inches, 5 inches, or random offsets. Always follow your specific shingle manufacturer’s instructions. Their pattern is engineered for that particular shingle’s performance.
Step 10: Handle Roof Valleys Correctly
Valleys channel enormous amounts of water.
You have two main valley methods: open valley and closed valley.
Open valleys use metal flashing as a visible channel down the valley. The shingles stop short of the valley center, leaving the metal exposed.
To install an open valley, center your valley flashing in the valley. It should extend at least 12 inches on each side of the valley centerline.
Secure it with roofing nails along the edges only—never through the center where water flows. As shingles reach the valley, trim them at an angle following the valley line. Leave the metal exposed down the middle.
Seal the cut edges with roofing cement to prevent water from wicking under the shingles.
Closed valleys (also called woven or cut valleys) have shingles running across the valley. One side’s shingles extend across the valley, then the other side’s shingles are cut to fit and overlap.
This method requires precision cutting. Each shingle crossing the valley must be trimmed at the right angle and sealed properly.
For Long Island’s heavy rainfall and snow melt, we typically recommend open valleys with quality metal flashing. They handle high water volume better and last longer.
Step 11: Flash Around Chimneys and Penetrations
Every roof penetration is a potential leak point.
Step flashing protects where your roof meets vertical walls or chimneys. These are rectangular metal pieces that weave between shingle courses.
Each step flashing piece is about 10 inches long and bent at 90 degrees. Half sits on the roof, half runs up the wall or chimney.
As you install shingles alongside a chimney, install one piece of step flashing with each course. The next course of shingles covers each piece of step flashing.
Never nail through the flashing’s vertical leg—only through the part laying flat on the roof. The vertical portion needs to move independently.
Apply roofing cement between the flashing and the roof surface for a watertight seal.
Counter flashing goes on top of step flashing, typically embedded into mortar joints on brick chimneys. This creates a two-part system that accommodates building movement.
For plumbing vents, use rubber pipe boots. Slide the boot over the pipe, then cut the next shingle to fit around it. Apply roofing cement generously around the base.
Skylights require manufacturer-specific flashing kits. Don’t improvise—use the kit designed for that skylight model.
Step 12: Install Ridge Cap Shingles
The ridge is your roof’s crown—finish it right.
Never use standard field shingles on ridges. They don’t bend properly and won’t seal correctly. Ridge cap shingles are specifically designed for this application.
Some manufacturers sell pre-cut ridge cap pieces. Others require you to cut standard shingles into three pieces.
To cut your own, separate a three-tab shingle at the cutouts. Each tab becomes one ridge cap piece.
Start at one end of the ridge (downwind from prevailing winds if possible). Place your first ridge cap shingle so it straddles the peak, with equal coverage on both sides.
Nail it with two nails, one on each side, about 6 inches from the end and 1 inch down from the top edge.
Place the next ridge cap overlapping the first by about 5-6 inches. The overlap should hide the nails from the previous piece.
Continue across the entire ridge, maintaining consistent overlap and exposure.
For your last piece, you may need to trim it to length. Apply extra roofing cement under this final piece since you can’t overlap it.
Seal any exposed nail heads with small dabs of roofing cement. This prevents water infiltration.
Step 13: Final Inspection and Cleanup
Professional installations include thorough quality checks.
Walk the entire roof and inspect your work. Look for:
Proper nail placement and driven flush
Consistent shingle alignment and exposure
All flashing properly sealed with no gaps
Ridge caps secure and properly overlapped
No lifted shingle corners or edges
Check that all cut edges are straight and sealed with cement where required.
Make sure no nails are exposed anywhere on the roof surface. Cover any you find with roofing cement.
Clean your gutters and downspouts. Installation debris will accumulate there.
Remove all nails, debris, and old materials from around your property. Use a magnetic sweeper on driveways and lawns—loose nails puncture tires and feet.
Inspect your property for any damage from falling materials. Better to catch it now than discover it weeks later.
Common Mistakes That Cause Roof Failures
Even experienced DIYers make these errors.
Improper nail placement ruins wind resistance. Nails placed too high don’t secure the shingle below. Too low, and they’re exposed to weather. One inch above the cutouts (or following manufacturer lines) is critical.
Overdriving or underdriving nails creates problems. Overdriven nails puncture the shingle, creating tiny leak points. Underdriven nails create bumps and don’t seal properly.
Skipping the ice and water barrier saves maybe $200. It costs $5,000+ when ice dams force water into your home and ruin ceilings, insulation, and walls.
Ignoring manufacturer installation instructions voids your warranty. Those “suggestions” are actually requirements for warranty coverage.
Improper valley installation causes concentrated leak problems. Valleys handle huge water volumes—they need metal flashing and proper sealing.
Understanding Shingle Types and Quality
Not all shingles perform equally on Long Island roofs.
Three-tab shingles are the economy option. They’re thinner, lighter, and have a flat appearance. Life expectancy is 20-25 years in ideal conditions—less with our harsh weather.
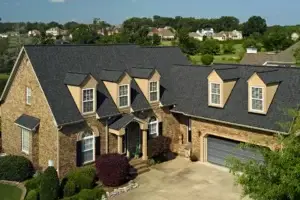
Architectural shingles (also called dimensional or laminate shingles) are thicker and heavier. They create a textured, layered look that mimics wood shakes or slate. These premium shingles last 30-50 years and offer superior wind resistance.
Designer shingles (luxury shingles) provide the highest quality. They replicate the appearance of slate, cedar shake, or clay tile while delivering the benefits of modern asphalt technology.
For Long Island’s climate, we recommend at minimum architectural shingles with high wind ratings. CertainTeed’s Landmark series offers excellent performance and value.
Look for shingles rated for at least 110 mph wind resistance. Coastal areas need even higher ratings.
Class A fire resistance, algae resistance, and impact resistance are all important for our area. Don’t compromise on these features.
When Temperature Matters for Installation
Shingle installation has ideal temperature ranges.
Most manufacturers specify 40-85°F as the ideal range. Below 40°F, shingles become brittle and difficult to work with. The adhesive strips may not seal properly in cold weather.
Above 85°F, shingles get soft and damage easily. Walking on them can dent or mark the surface. The heat also makes the work physically brutal.
Early morning or late afternoon installations in summer avoid peak heat. Spring and fall are ideal seasons for Long Island roof work.
If you must work in cold weather, store shingles indoors overnight. Warm shingles are more pliable and seal better.
Never install in rain, snow, or on wet roof decks. Moisture trapped under shingles causes rot, mold, and adhesion problems.
The Real Cost of DIY vs. Professional Installation
Let’s talk money—the real numbers.
A typical Long Island home (2,000 square feet) needs about 60 squares of shingles. At $80-150 per square for quality shingles, that’s $4,800-9,000 in materials alone.
Add underlayment, ice and water shield, drip edge, valley flashing, ridge caps, nails, and cement. Another $1,500-2,500 in materials.
Now equipment rental: pneumatic nailer, air compressor, safety harness, scaffolding if needed. Maybe $500-800 for a week.
Dumpster rental for tear-off debris: $400-600.
Total DIY material and equipment cost: roughly $7,200-13,900 for a basic job.
Professional installation for that same house: $8,000-15,000 installed, including removal, disposal, materials, labor, and warranty.
That’s not much difference—and professionals include insurance, workman’s comp, warranties, and guaranteed workmanship.
Now factor in your time. A professional crew completes most residential roofs in 1-3 days. DIYers typically take 1-3 weeks of weekends.
What’s your time worth? What’s the risk of doing it wrong worth?
And here’s the kicker: improper DIY installation voids your shingle manufacturer’s warranty. That 50-year warranty you paid for? Gone if a professional didn’t install it per manufacturer specs.
Roof replacement costs vary, but the difference between DIY and professional installation is smaller than most people think—especially when you factor in risk, warranties, and time.
Why Long Island Roofs Need Professional Installation
Our climate is uniquely demanding on roofing systems.
Nor’easters bring sustained high winds, driving rain, and rapid temperature fluctuations. These storms test every aspect of your installation.
Ice dams are a serious threat in our winters. Proper ice and water barrier installation, adequate ventilation, and correct insulation details prevent them—but only if done right.
Salt air in coastal areas accelerates material breakdown. Proper flashing installation and quality materials become even more critical.
Summer heat and UV radiation degrade asphalt shingles faster than in milder climates. Wind-resistant shingles properly installed last longer.
Local building codes exist for good reason—they’re based on our specific climate challenges. Professionals know these codes inside and out.
Our team of fully certified and trained professionals understands these Long Island-specific requirements. We’ve been protecting homes here for 35 years, through countless nor’easters, blizzards, and heat waves.
The Value of Professional Warranties
Manufacturer warranties are only part of the equation.
Most quality shingles come with 30-50 year limited warranties. But these only cover material defects—not installation problems.
And here’s the critical detail: these warranties require certified professional installation. DIY voids the warranty entirely.
Beyond material warranties, professional contractors provide workmanship warranties. We warranty our labor and installation for years beyond the project completion.
If a leak develops because of an installation error, we fix it—at no cost to you. Try getting that warranty from yourself as a DIYer.
We’re also fully insured. If someone gets injured during installation, or if property damage occurs, insurance covers it. Your homeowner’s policy may not cover DIY roofing accidents.
Signs Your Roof Needs Professional Help
Some situations absolutely require professional expertise.
Multiple layers of old shingles mean more weight and difficult tear-off. This is physically demanding and requires proper disposal.
Structural damage, sagging, or soft spots in your roof deck indicate problems beyond simple re-shingling. These need engineering assessment.
Complex roof designs with multiple valleys, dormers, skylights, and intersecting planes require advanced flashing skills. One mistake creates persistent leaks.
Steep pitches (anything over 6/12) are dangerous without professional safety equipment and experience. Don’t risk your life.
If your home is more than two stories, the fall hazard increases dramatically. Professional crews have proper scaffolding, safety systems, and insurance.
Historical homes or specialty roofing materials (slate, tile, metal) require specific expertise. Don’t learn on your forever home.
How County Roofing Systems Ensures Quality Installation
We’ve been serving Long Island for 35 years—here’s how we do it right.
Our team of fully certified and trained professionals receives ongoing education on the latest installation techniques and materials. We’re certified installers for major manufacturers including CertainTeed, GAF, and Owens Corning.
We never use subcontractors. Every person on your roof is a County Roofing Systems employee, background-checked, and fully trained.
Our installation process follows manufacturer specifications exactly—guaranteeing warranty protection and optimal performance.
We use only premium materials designed for Long Island’s climate. Our shingle selection includes options proven to handle coastal weather, heavy snow loads, and intense summer heat.
Every project includes a comprehensive inspection before, during, and after installation. We catch problems before they become leaks.
We provide detailed warranties on both materials and workmanship. You’re protected long after we finish your roof.
And we’re local. When you need service, we’re here—not a 1-800 number to a call center in another state.
Protecting Your Investment With Proper Installation
Your roof is more than shingles—it’s your home’s primary defense system.
Proper installation protects your home structure, insulation, belongings, and family from weather extremes. Cut corners on installation, and you’ll pay for it with leaks, damage, and premature replacement.
The difference between adequate installation and professional installation is measured in years of roof life and thousands in prevented damage.
Quality roof shingle installation isn’t where you cut costs—it’s where you invest in protection.
Ready for a Roof That Lasts?
Now you understand what proper shingle installation involves—and why it’s not a typical weekend DIY project.
If you’re a skilled professional with proper equipment, experience, and time, a small shed roof might be manageable. But for your home—your biggest investment—professional installation is the smart choice.
County Roofing Systems has been protecting Long Island homes for over 35 years. We know local weather, building codes, and what it takes to deliver roofs that last decades.
Our certified team installs your roof right the first time, backed by industry-leading warranties and our commitment to excellence. No shortcuts. No subcontractors. Just skilled craftsmen who take pride in every roof we install.
Ready to protect your home with professional-grade installation? Contact County Roofing Systems today for a free consultation. Let’s discuss your roof, answer your questions, and show you exactly what proper installation looks like.
Call us or fill out our contact form. Your roof deserves the County Roofing Systems difference.