Step 1: Immediate Actions to Take When You Discover a Leak
Time matters when dealing with water intrusion. Here are precautions to take when discovering a leak:
Protect your belongings first
Move furniture, electronics, and valuables away from the leak. Place buckets to catch dripping water. If water is pooling on your ceiling, carefully puncture the lowest point with a screwdriver to let it drain into a bucket—this prevents ceiling collapse and spreads the damage.
Document everything
Take photos and videos of the leak, ceiling damage, and any visible exterior roof damage. This documentation is critical for insurance claims. Note the date and weather conditions when you discovered the leak.
Shut off electricity
If water is near light fixtures, outlets, or electrical panels, shut off nearby electrical items. Water and electricity create life-threatening situations—don’t take chances. Flip breakers for affected areas until an electrician confirms safety.
Find the source in your attic
If you can safely access your attic during or shortly after rain, closely examine the attic for flow lines or water trails on the ceiling and rafters. These flow lines can help you identify the exact location of the leak.
Bring a flashlight and follow water trails upward toward the roof. Water travels along rafters and roof decking before dripping, so the entry point is always higher than where you see water inside.
Mark the location
Once you’ve traced water to its highest point in the attic, push a wire or nail through the roof from inside so you can find the exact spot when you go outside. This saves hours of searching on the roof.
Call County Roofing Systems immediately at (631) 608-5757.
We provide fast leak repairs throughout Long Island and can often respond the same day. Even if you plan temporary repairs yourself, it’s hard to ensure you’ll do it right and keep the leak from coming back. Plus, getting on our schedule ensures a permanent fix happens quickly.
Step 2: Emergency Temporary Leak Repairs
Sometimes you need to stop water intrusion before professionals arrive.
Safety comes first—always. Never climb on your roof during storms, at night, when it’s icy, or if you’re uncomfortable with heights.
Slippery roofs and steep pitches kill people every year. Before attempting any repairs, inspect the roof from ground level to assess visible damage and ensure it is safe to proceed. If conditions aren’t safe, wait for professionals.
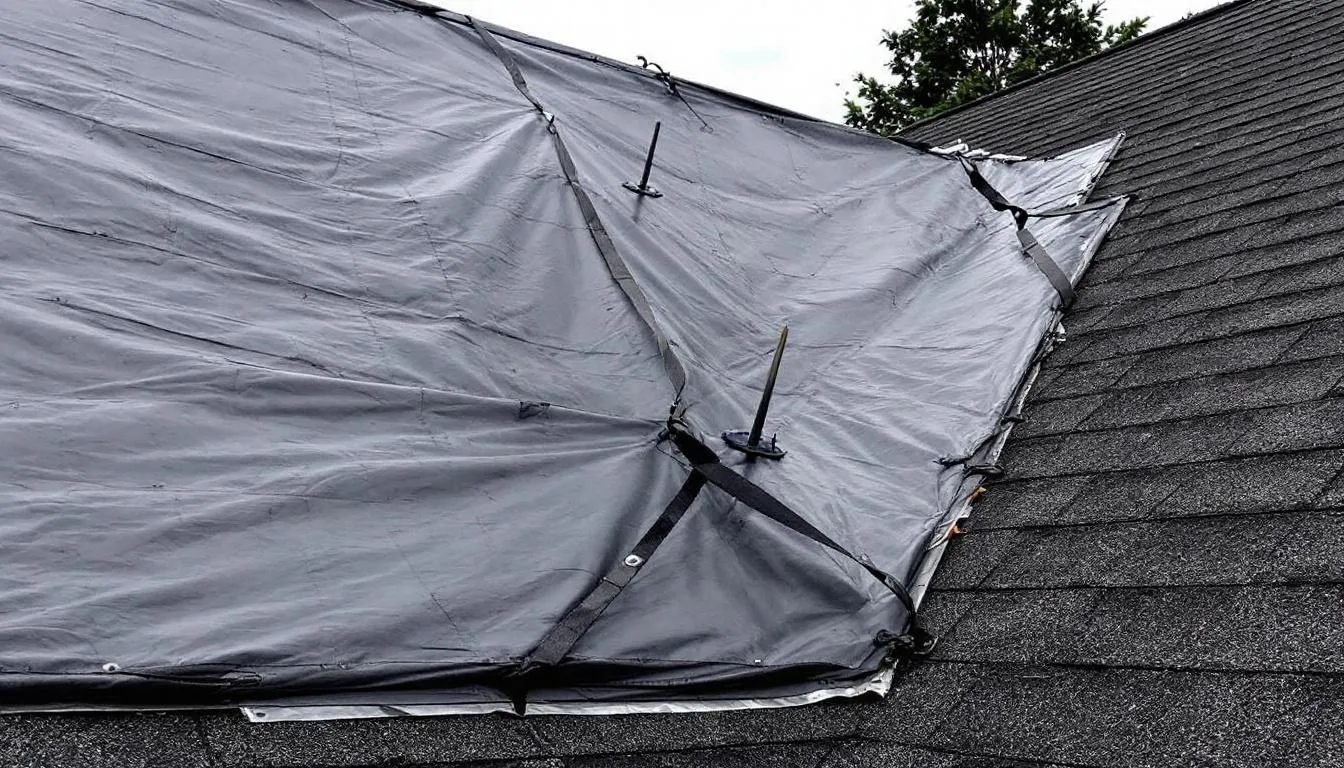
Tarp the affected area for immediate protection. Use a heavy-duty tarp large enough to cover the leak plus 4 feet beyond it in all directions.
Position the tarp so it extends over the roof ridge if possible—this prevents water from getting under it. Secure it with 2×4 boards screwed to the roof (not just weighted down with bricks, which blow off in wind).
Apply roofing cement for small leaks. If you’ve located a specific small problem—a lifted shingle corner, a visible crack, or a nail pop—roofing cement provides temporary waterproofing.
For tiny holes, roof sealant can be used as a temporary measure, but it is not a substitute for proper repairs like replacing flashing or shingles. Clean the area, apply a generous bead of cement, and smooth it flat. This works for days or weeks depending on weather conditions.
Use roof repair tape for emergency patches. Self-adhesive rubberized repair tape works on clean, dry surfaces. It sticks to shingles, flashing, and even small holes in roof decking.
While not a permanent solution, it can prevent water intrusion until proper repairs are completed.
Also, never use caulk or silicone from the hardware store on roofing repairs. These products aren’t designed for roof applications, won’t stick properly to roofing materials, and fail quickly. Use roofing-specific products only.
Finally, understand temporary limits. Emergency repairs buy time—nothing more. They don’t fix underlying problems.
Heavy rain, wind, temperature extremes, and ice all compromise temporary patches. Schedule permanent repairs immediately after installing temporary fixes.
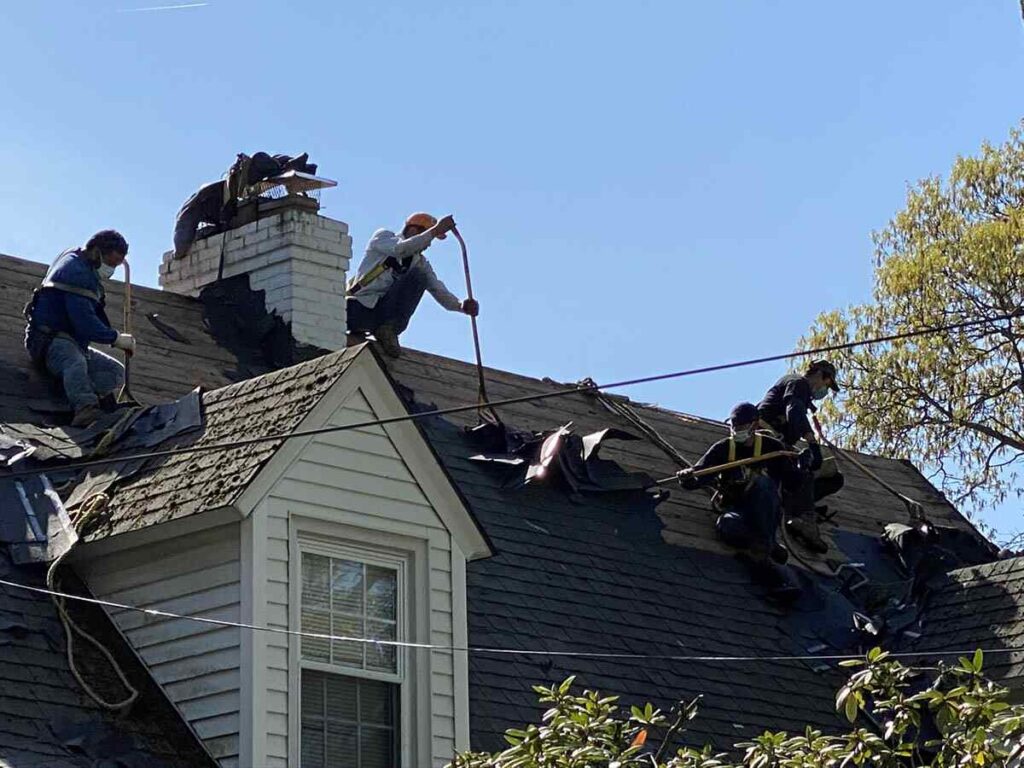
Step 3: How to Find the Exact Leak Source
Water rarely enters where you can see it inside. So, you’ll need to be proactive and intentional about finding the source of the leak.
Here are steps for doing that:
Check the attic first
Preferably, on a rainy day or shortly after. Active leaks are easiest to find when water is flowing. Bring a bright flashlight and look for wet spots, water stains, or mold on rafters, roof decking, and insulation.
Follow wet trails upward—water always travels downhill along structural members before dripping. Look for obvious signs of a leaking roof, such as water stains, dripping, or damp insulation, which can indicate the source of the leaking.
Use the hose test
If the leak isn’t obvious, this is a great way to locate it. You need two people—one in the attic watching for water, one on the roof with a hose.
Start low on the roof, well below the suspected leak area. Soak one section thoroughly for several minutes while your partner watches the attic. Gradually move the hose upward until water appears inside. This pinpoints the exact entry point.
Focus on the usual suspects:
Valleys where two roof planes meet handle huge water volumes. Check for damaged flashing, improperly overlapped shingles, or missing underlayment.
If you suspect a hidden leak, consider removing shingles in the affected area to inspect the roof deck for water damage or concealed leaking.
Chimneys leak around flashing—especially the back side where water ponds. Look for gaps between flashing and brick, corroded metal, or missing counter-flashing.
Vent pipes leak when rubber boots crack from UV exposure. Inspect every plumbing vent for splits in the rubber seal or separated flashing. Pay attention to missing or pulled nail heads that secure the vent boot, as these can lead to leaks.
Wall intersections where your roof meets siding require step flashing. Check for missing or damaged flashing pieces, improperly overlapped components, or low siding that traps water.
Skylights leak around their flashing or through failed seals in the glass itself. Water stains directly below a skylight often indicate frame seal failure rather than roof leaks.
Look for these clues on the exterior:
Lifted or damaged shingles near where you see interior water
Visible gaps in flashing where metal has pulled away from surfaces
Cracked or missing caulk seals around penetrations
Rust stains indicating corroded metal components
Moss or algae growth creating dams that trap water
Inspect for exposed nails and nail heads, as these can be entry points for moisture and cause leaking
Also, check window edges for gaps or cracks that could allow water intrusion.
Mark everything you find with tape or chalk so you remember locations when you return with repair materials.
Step 4: DIY Repairs for Simple Roof Leaks
DIY roof repair is suitable for minor issues, but more complex problems should always be left to professionals.
Replacing damaged shingles solves the most common leak cause. You’ll need a pry bar, roofing nails, roofing cement, and a new shingle matching your roof. Work on dry days above 50°F when shingles are flexible.
Carefully lift surrounding shingles and remove nails holding the damaged shingle. Slide out the old shingle and slide in the new shingle, ensuring proper alignment. Nail it in place—four nails per shingle—then apply roofing cement under the lifted edges of surrounding shingles and press them back down.
Resealing lifted shingles fixes wind damage without replacement. Lift the shingle carefully, and before applying roofing cement, use a putty knife to remove any old caulk or debris for a clean surface.
Then apply a generous bead of roofing cement underneath and press it flat. Hold or weight it down for several minutes until the cement bonds. This works for shingle corners and edges that have pulled up but aren’t otherwise damaged.
Replacing deteriorated vent boots stops common plumbing stack leaks. Vent boot kits include new flashing and rubber seals sized to fit standard pipe diameters.
Carefully remove shingles around the old boot, pull out the old unit, slide the new one over the pipe, replace shingles, and seal everything with roofing cement.
What you should NOT attempt yourself:
There are several repair items you absolutely should not attempt to repair yourself, for risk of injury or damaging your home:
Valley repairs require extensive shingle removal and proper underlayment installation—improper valley work guarantees future leaks.
Chimney flashing involves complex step flashing, counter flashing, and often cutting into masonry—mistakes here cause expensive structural damage.
Multiple leak locations suggest widespread roof failure requiring complete professional assessment.
Leaks on steep-pitch roofs (greater than 6:12) where fall risks are extreme.
Even attempting to patch a tiny hole may seem easy, but improper repairs can lead to bigger problems.
Any situation where you’re unsure of the cause or uncomfortable working on the roof should also be considered a risk as well.
There are many things that can go wrong during repair and only a professional will be able to act quickly to handle unexpected complications.
Fixing a Flat Roof: Special Considerations for Long Island Homes
Flat roofs are a popular choice for many Long Island homes, but they come with their own set of challenges when it comes to roof leak repair.
One of the biggest concerns is standing water—flat roofs must be properly sloped to allow water to drain off, or you risk persistent roof leaks.
Regularly inspect your flat roof for missing flashing or areas where the roof coating has worn thin, as these are common entry points for leaks.
When repairing a flat roof, it’s crucial to use a high-quality roof coating to create a watertight seal over the entire surface.
Pay special attention to seams, edges, and any spots where water tends to pool. Installing or maintaining a proper drainage system can also help prevent leaks by ensuring water doesn’t accumulate after heavy rain.
By addressing these unique flat roofing concerns, you’ll extend the life of your roof and keep your home protected from leaks and water damage.
Preventing Ice Dams on Long Island Roofs
Ice dams are a frequent cause of roof leaks on Long Island, especially during harsh winters.
To prevent ice dams from forming on your roof, start by making sure your attic is well-insulated and properly ventilated.
This helps keep warm air from escaping into the attic and melting snow on the roof, which can then refreeze at the eaves and create a dam.
Keep your gutters and downspouts clear of debris so melting snow and ice can flow freely off your roof. Installing gutter guards can help prevent leaves and twigs from clogging your gutters, reducing the risk of leaks caused by ice dams.
By taking these preventative steps, you’ll protect your roof from leaks and avoid costly repairs during the winter months.
Step 5: Professional Leak Repairs vs. DIY—When to Call Experts
Knowing your limits prevents expensive mistakes. Your roof is a vital piece of your home, which means mistakes and lack of proper repair steps can be very costly.
DIY makes sense for:
SOME single damaged or missing shingles that are easily accessible.
Simple vent boot replacements on standard plumbing vents are possible as well.
Lifted shingle corners requiring only resealing, but can still be a bit tricky unless you’ve done something similar before.
Small flashing gaps that need caulk or cement should be handled by a professional, but are possible for something with experience.
Professional repairs are essential for:
For everything else, a professional should be consulted. As mentioned above, mishandling roof repairs can be far costlier than investing in a roof repair itself.
Here are some especially notably situations where a professional should be use:
Leaks you can’t locate despite thorough investigation
Multiple leak points suggesting systemic failure
Any chimney-related leaks involving flashing or masonry
Valley leaks requiring shingle removal and underlayment work
Structural damage visible in your attic or from below. Leaks persisting after attempted DIY repairs. Storm damage potentially covered by insurance
Situations where improper repairs could void your roof warranty
Most leaks can be efficiently handled by professionals, but if the entire roof is compromised, a full replacement may be necessary.
At County Roofing Systems, our team of expert roofers will give you all the information you need to know whether a roof repair is the smart choice or if your roof is too far gone and a full roof replacement is necessary.
Another thing to consider: Long Island building codes may require permits for certain roof repairs.
Professional contractors handle these requirements and ensure work meets local standards—important for insurance claims and future home sales.
County Roofing Systems brings 35+ years of leak repair expertise to every Long Island job. We find leaks other contractors miss because we understand how water travels through Long Island’s specific roof designs and construction methods. Our repairs come with warranties and won’t void your roofing material warranties.
Damaged Flashing Repair: What Homeowners Need to Know
Damaged flashing is one of the most common sources of roof leaks, and repairing it quickly is key to preventing water damage to your home.
Flashing is used to seal the joints where your roof meets walls, chimneys, and vents. If you suspect damaged flashing, carefully remove the surrounding shingles to inspect the area. Look for signs of rust, cracks, or gaps that could allow water to seep through to the roof deck.
Depending on the extent of the damage, you may need to replace the flashing entirely or apply fresh roofing cement to create a watertight seal.
Be sure to check the roof deck and surrounding shingles for any signs of water damage or rot, as leaks can cause hidden problems beneath the surface.
If you’re unsure about the repair process or the damage is extensive, it’s best to call a professional roofer. Properly repairing damaged flashing will help prevent future roof leaks and extend the life of your roofing system.
Common Roof Leak Repair Mistakes to Avoid
These errors make leaks worse or create new problems.
Over-applying roofing cement creates dams that trap water instead of letting it shed naturally. Roofing systems work through gravity drainage—blocking that flow causes worse damage. Use cement sparingly and only where manufacturers recommend.
Ignoring the underlying cause. Fixing a damaged shingle without asking “why did it fail?” means the same problem recurs. Wind damage suggests poor installation or aged adhesive.
Cracked shingles indicate roof age or improper attic ventilation. Address root causes, not just symptoms.
Using wrong materials. Hardware store caulk, household adhesives, and non-roofing products fail quickly on roofs. Temperature extremes, UV exposure, and constant water contact destroy inappropriate materials within weeks. Use roofing-specific products designed for exterior exposure.
Delaying permanent repairs after installing temporary fixes. That tarp you put up six months ago? It’s now damaging your roof worse than the original leak.
Tarps trap moisture, flap in wind loosening shingles, and screws you used to secure them create dozens of new leak points. Temporary means days or weeks—not months.
Not checking for hidden damage. Visible leaks almost always indicate hidden problems. Water has soaked insulation, damaged electrical wiring, rotted framing, and promoted mold and mildew growth.
Water intrusion can lead to mildew growth as well as mold and structural issues. Fix the leak but also address collateral damage—otherwise you’re living with health hazards and structural issues.
Trying to work in unsafe conditions. More homeowners die from falls than any other home improvement activity. Roof work demands good weather, proper equipment, and comfort with heights. Don’t risk your life to save a few hundred dollars.